AWS App Runner is a fully managed service provided by Amazon Web Services (AWS). It makes it easy for developers to quickly deploy containerized web applications and APIs, at scale and with no prior infrastructure experience required. It automates management tasks such as provisioning, scaling, and security, enabling developers to focus on writing code rather than managing infrastructure.
How It’s Useful:
- Simplicity and Speed: It simplifies the deployment process by abstracting away the underlying infrastructure. Developers can deploy their applications quickly by providing the source code or a container image.
- Scalability: App Runner automatically scales the application up or down based on traffic, ensuring that the application can handle peaks in demand without manual intervention.
- Integrated with AWS ecosystem: It seamlessly integrates with other AWS services, providing a comprehensive and secure environment for deploying applications.
- Cost-Effective: Pay only for the resources used without having to manage underlying servers, potentially reducing the cost of running web applications and APIs.
- No infrastructure management: It eliminates the need to provision, configure, or manage servers, load balancers, and scaling mechanisms.
Comparison with Other Providers:
- DigitalOcean App Platform: Like AWS App Runner, DigitalOcean’s App Platform is a platform-as-a-service (PaaS) offering that allows developers to build, deploy, and scale apps quickly. While App Runner focuses on the AWS ecosystem, DigitalOcean’s App Platform provides a simpler, more straightforward pricing model and is often appreciated for its user-friendly interface and lower entry cost.
- Heroku: Heroku is another popular PaaS that simplifies the deployment process. It’s known for its ease of use and was one of the pioneers in platform as a service. Heroku supports multiple programming languages and has a strong add-on ecosystem. Compared to AWS App Runner, Heroku may offer more flexibility regarding language and framework support but might not provide the same level of integration with AWS services or the same scale of infrastructure.
- Google Cloud Run: This is Google’s fully managed compute platform that automatically scales your stateless containers. Google Cloud Run is similar to AWS App Runner in that it abstracts away the infrastructure, allowing developers to focus on their applications. Cloud Run is deeply integrated with Google Cloud services and offers both a fully managed environment and an Anthos-based environment for more control.
Deploying Apps Using AWS App Runner:
- Preparation:
- Have a Docker container image ready in a registry (Amazon ECR or any public registry) or source code hosted in a supported repository (e.g., GitHub).
- Ensure your application listens for HTTP requests on the port defined by the
PORTenvironment variable.
- Creating a Service:
- Go to the AWS App Runner console and choose to create a new service.
- Select the source of your application (repository or container registry) and configure the settings (e.g., deployment method, instance configuration, and environment variables).
- Configure the service settings, including the automatic deployment of source changes if desired.
- Deployment:
- After configuring the service, deploy your application. App Runner will build and deploy the application, handling all the infrastructure, including networking, security, and scaling.
- Monitoring and Management:
- Once deployed, you can monitor the application’s health and performance directly from the AWS console.
- App Runner provides automatic scaling, but you can adjust settings and configurations as needed.
Demo of Deploying a Node JS Application using App Runner
Go to the App Runner Service Page in AWS Console -> click “Create an App Runner Service”
We will be shown up with 2 types of deployment methods.
- Docker Images: Using Amazon ECR (Elastic Container Registry), can use both Private or Public Images
- Source Code Repository (For this we must need to select the provider among Github & Bitbucket)
In this article, I will go with Github, (Select Source code repository -> Provider ->> Github)
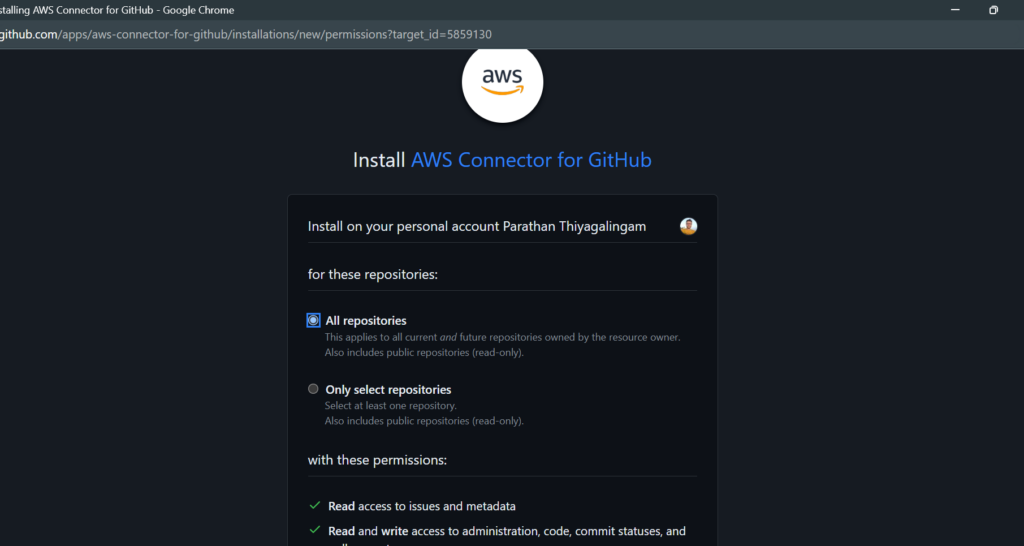
For the Github connection, if we are new then we need to add our Github connection to App Runner to access the repositories from our account.
After providing the Authorization to the “AWS Connector” app, in the window it will ask to name the connection -> The name can be anything to distinguish easily from the GitHub account we authorized.
And then, we need to install the AWS Connector app to authorize the repositories.
After configuring the authorization part, we can see the list of the repositories we allowed the AWS Connector to access.
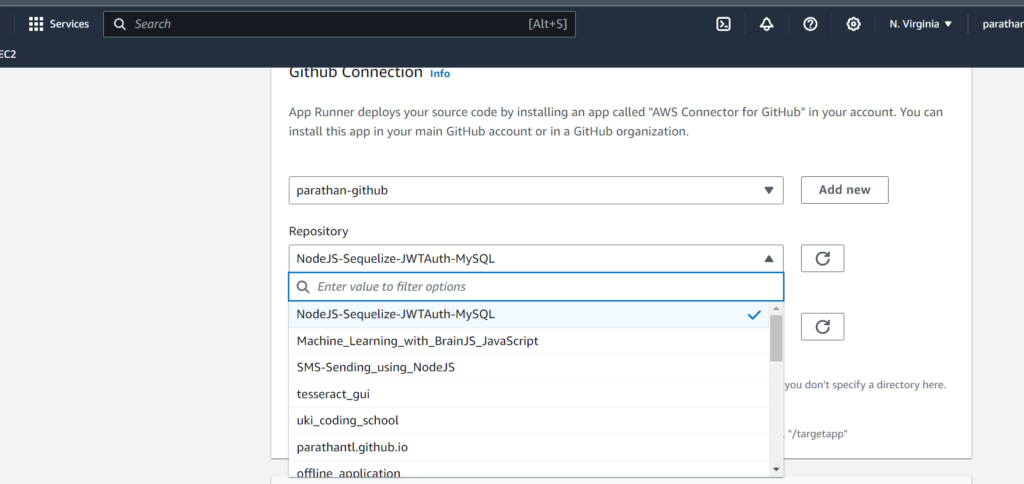
Then, we will select the repository we need for deployment and the branch that we need to get deployed.
We can configure the Source Directory, where if we are given any folder path, then the build and start commands that we will provide in the next setup will be executed in this directory. By default, the source directory is the root directory.
In the Deployment settings option, we can either select Manual or Automatic deployment. Where Automatic deployment will provide the option to trigger and deploy the app whenever the specific branch gets updated.
In the Next screen we will be shown to configure the Build settings:
Currently, we can deploy
- Coretto
- .NET
- Go
- NodeJS
- Python
- Php
- Ruby
applications.
So, let’s go with Node JS.
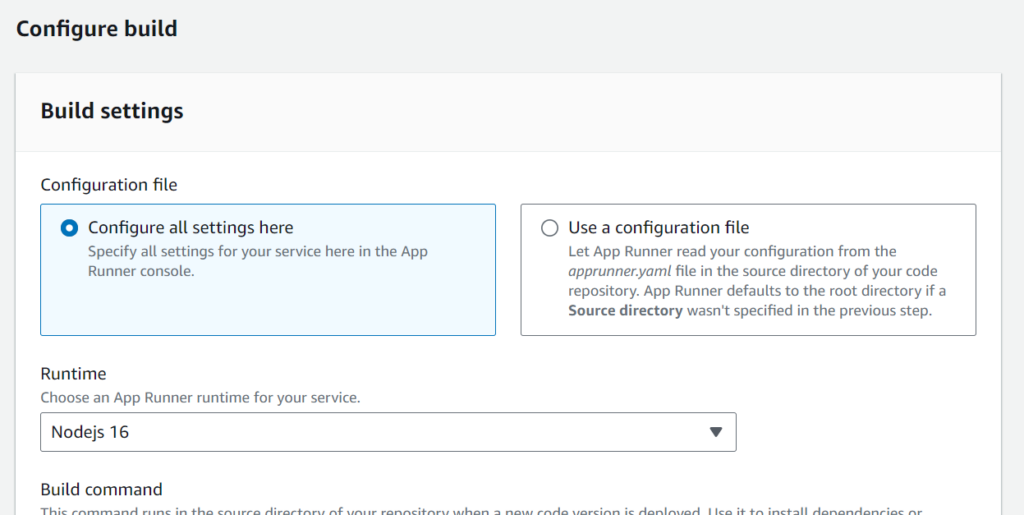
If we have any specific configuration and have customized it from the repository level,
then we can select the ‘Use a configuration file’ option, which will read the ‘apprunner. yaml‘ file for configuration and do the build settings.
I will go with setting up everything right here,
so for the build command:
npm install
Start command:
node index.js
On the next page, we will be shown up to configure the service settings:

According to our application needs, we can customize the CPU and Virtual memory allocation along with setting up the Environment Variables.
We can set up the IAM policy, and Autoscaling configurations on this page. For now, let’s keep everything with default values and set the service first.
The next page will show all the configurations for review and if we are good with it let’s click “Create & deploy”
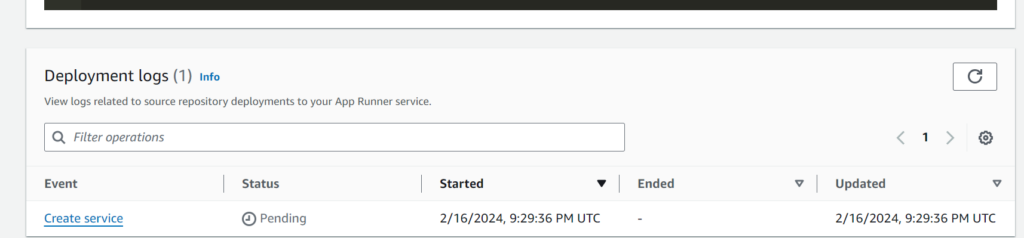
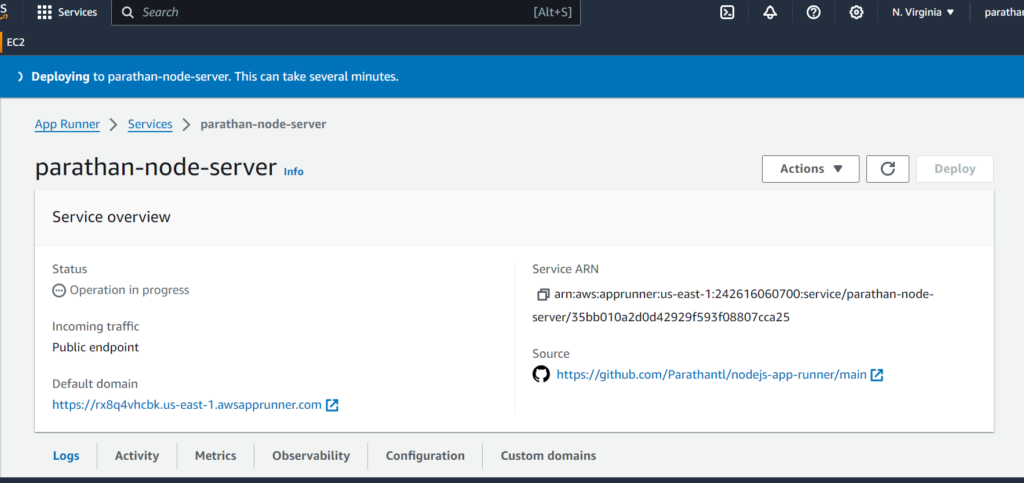
On the next page, we will be redirected to the app runner service detailed page. Where we can see a message that the app is currently being deployed. We can also see the logs of the app as well.
The following image shows what the app runner properties will look like. We will get a default domain or we can customize it with our domain as well.
Now, whenever we make changes to the branch that we configured to deploy, the deployment will triggered. That’s the beauty of the App Runner.
AWS App Runner is particularly useful for developers looking to deploy applications quickly without the hassle of managing infrastructure. It stands out for its integration with the AWS ecosystem and its ability to scale applications automatically. When compared to other services like DigitalOcean’s App Platform, Heroku, and Google Cloud Run, the choice often comes down to the specific needs of the project, cost considerations, and preferred cloud ecosystem. Each platform has its strengths, and the best choice depends on the requirements of the application you’re deploying.
Leave a Reply